Orbit
ORBIT - OpeRationg Business Intelligence Tool
Welcome to the documentation for ORBIT. This guide will walk you through the different steps to install, configure, and use the application, complete with screenshots for better understanding.
Table of Contents
- Installation
- Creating Your First Query
- Generating Charts and Reports
- Publishing Reports
- Exporting Data
- Customizing Filters
1. Installation
To install the application, follow these steps:
- Download the application file from the SourceForge page.
- Unzip the downloaded file into your desired folder.
- Ensure that Java 8 or higher is installed on your system.
- Launch the application by clicking the
d-clicicon.

2. Creating Your First Query
After installing, follow these steps to create your first query:
- Open the application, and from the home page, select “Create Query”.
- Choose the data sources you want to query from the available list.
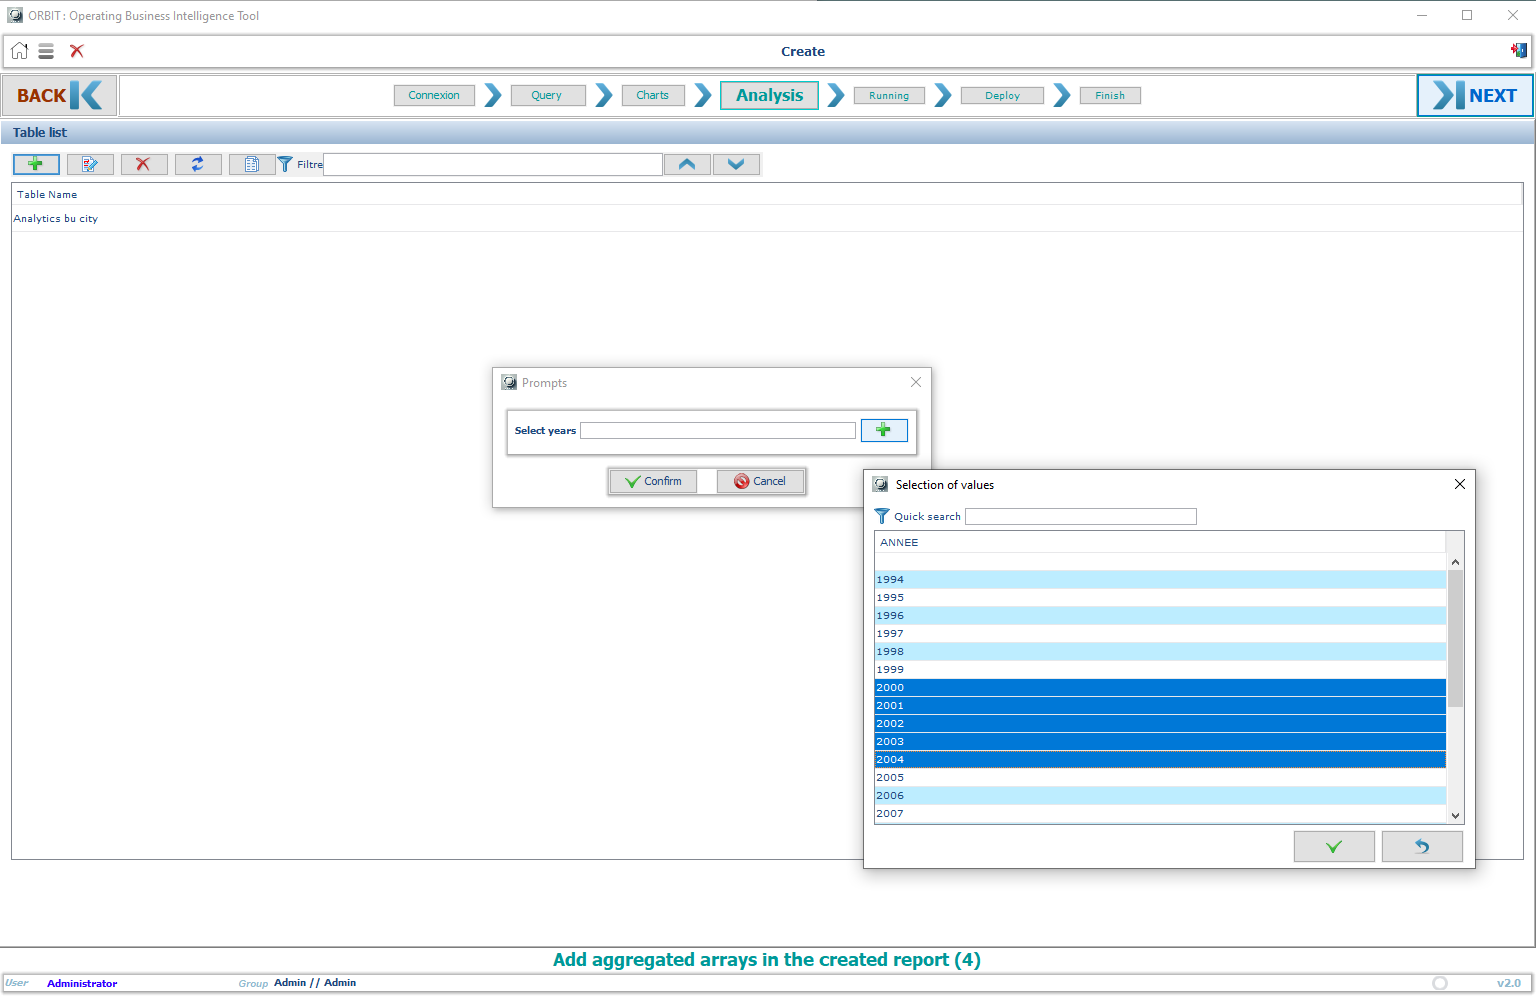
- Apply dynamic filters to customize your report (e.g., time period, country, product).
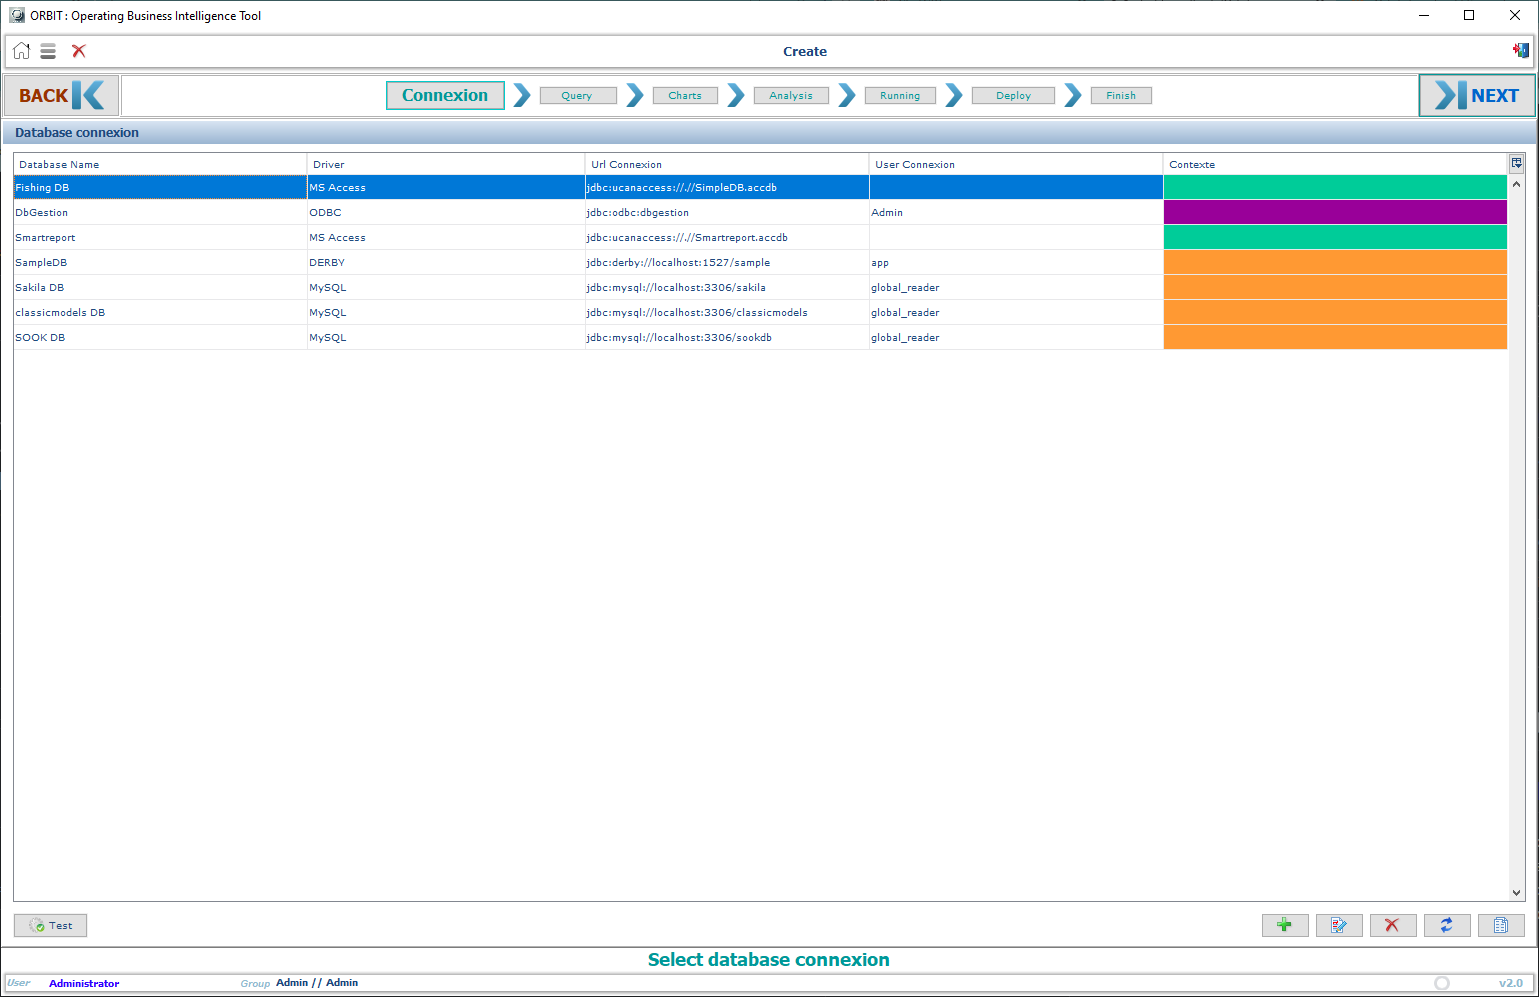
- Select your database connexion
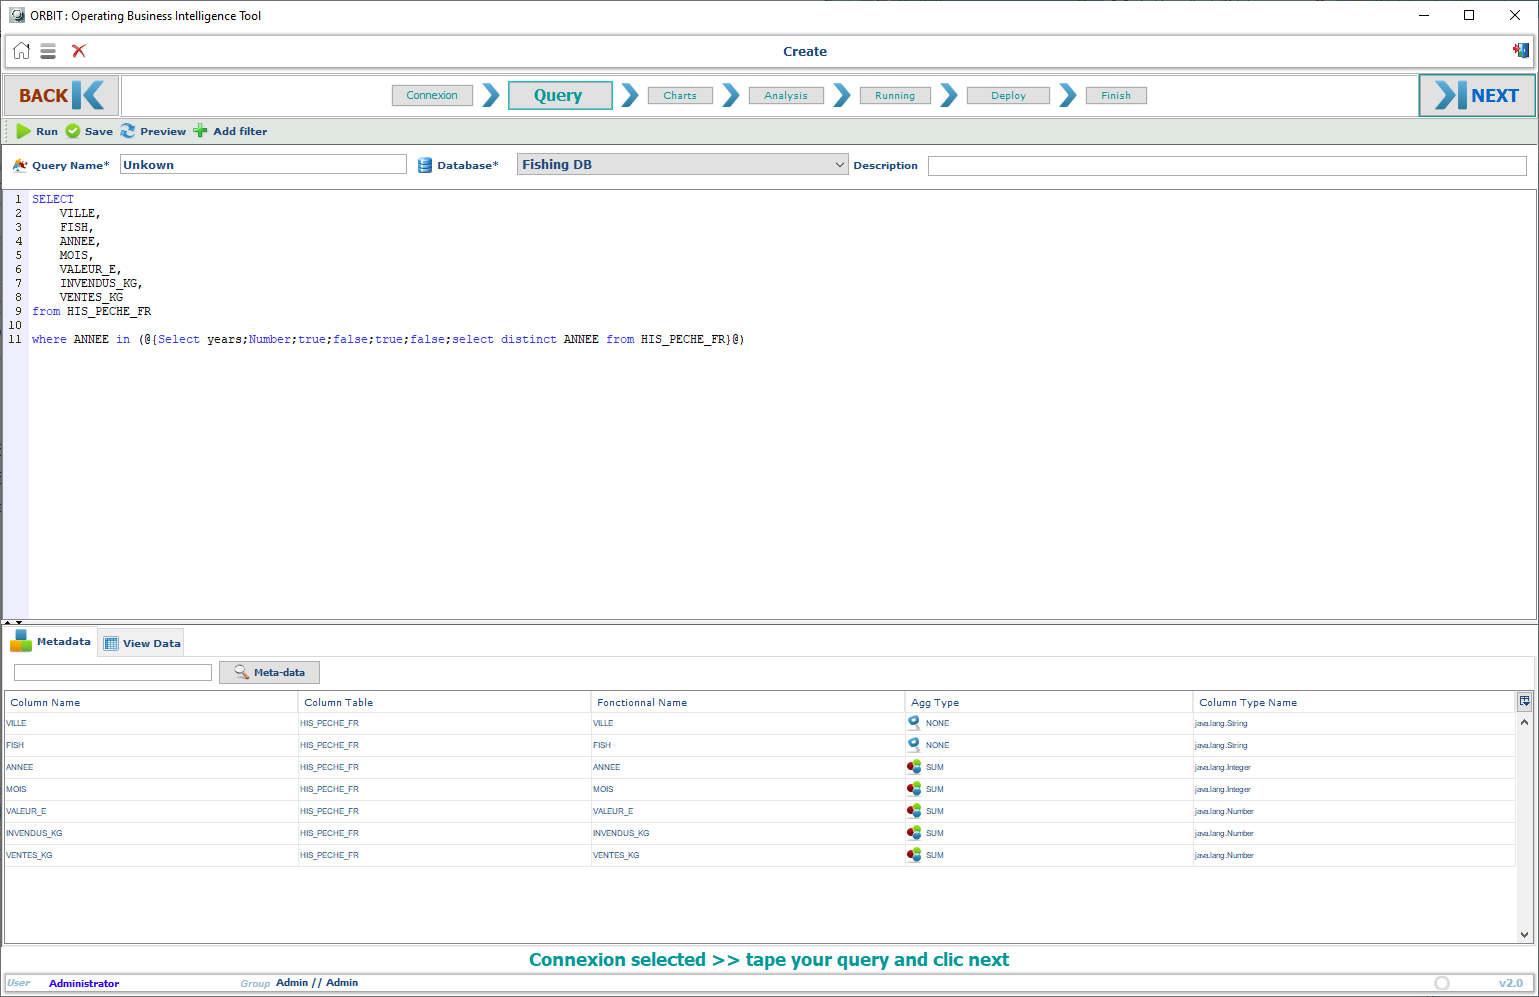
- Add your query
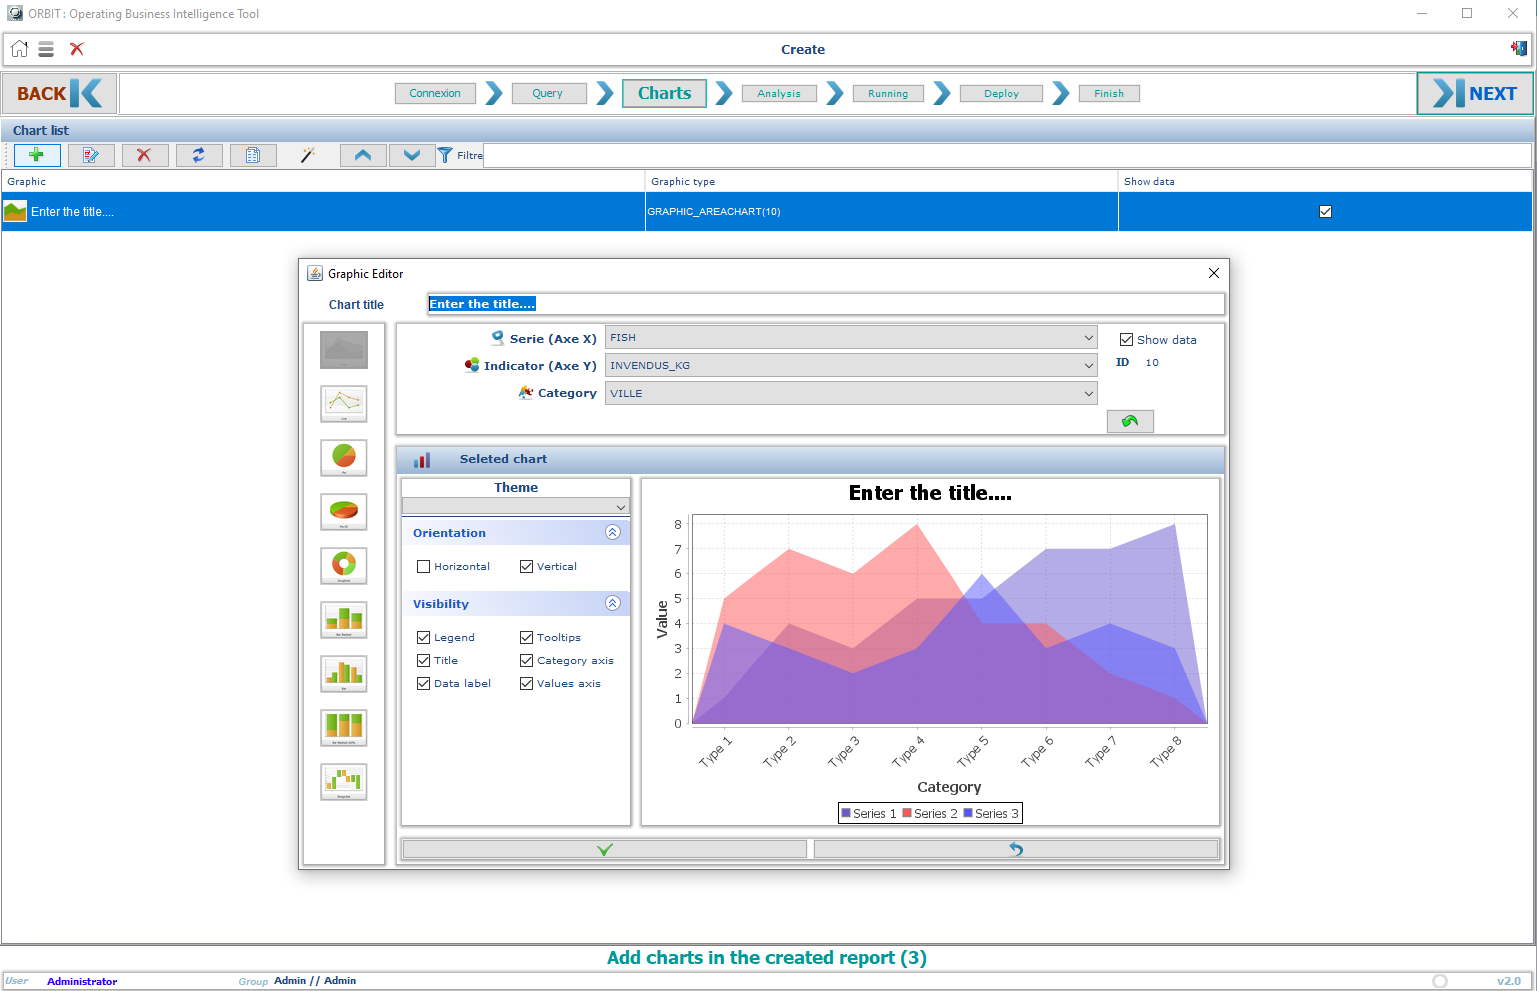
- Add your charts
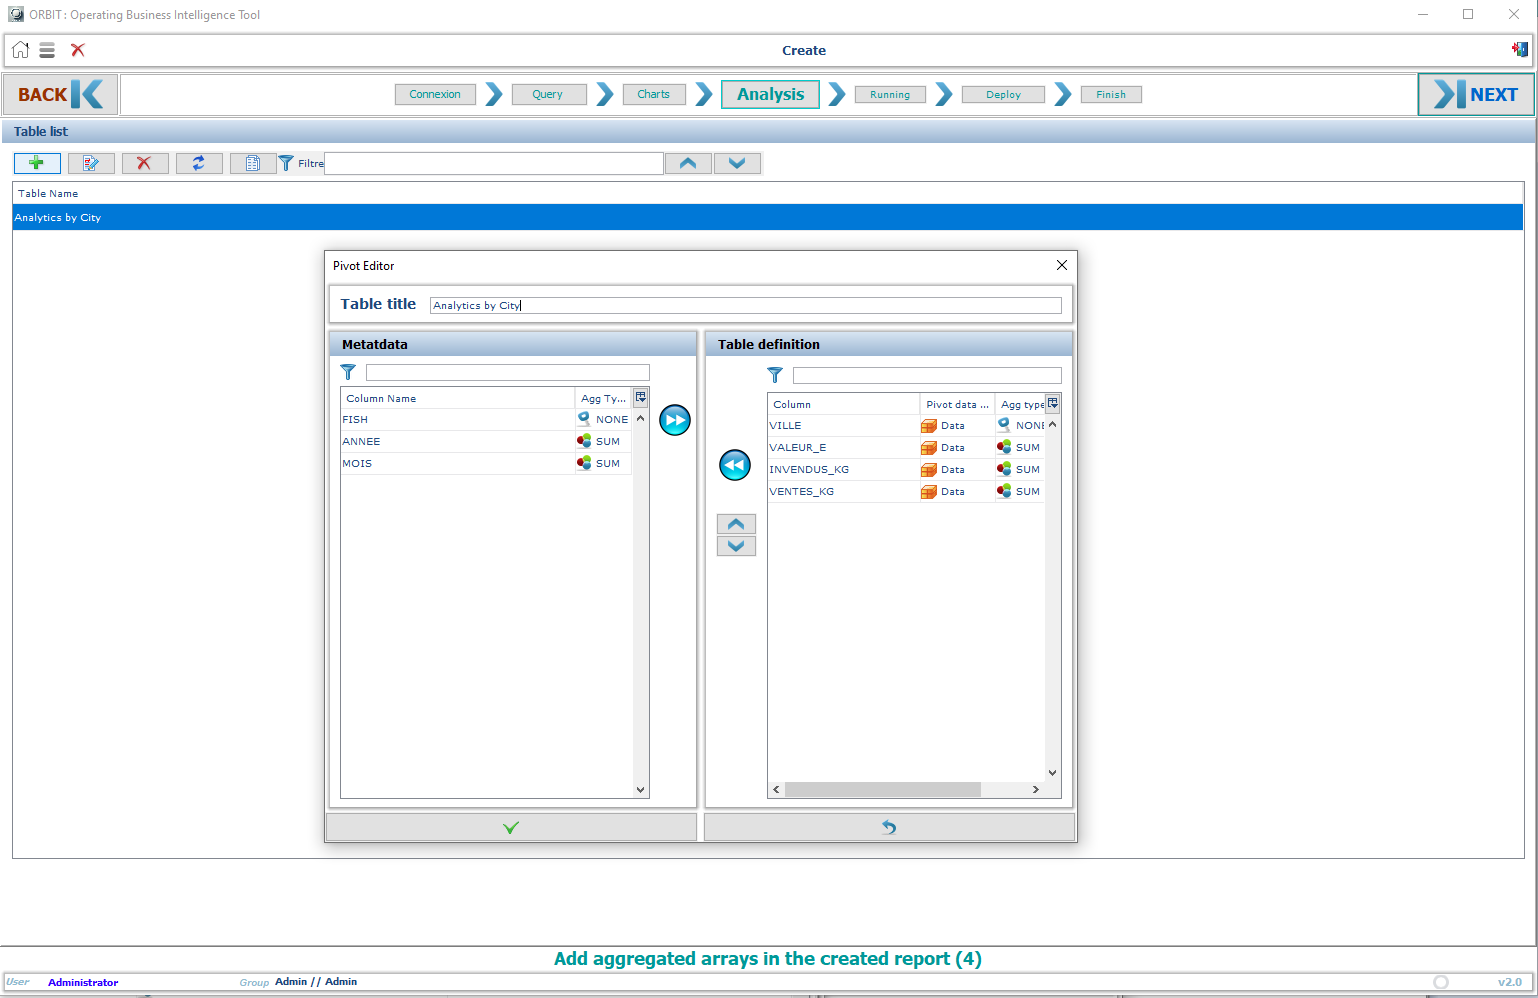
- Add your analytics
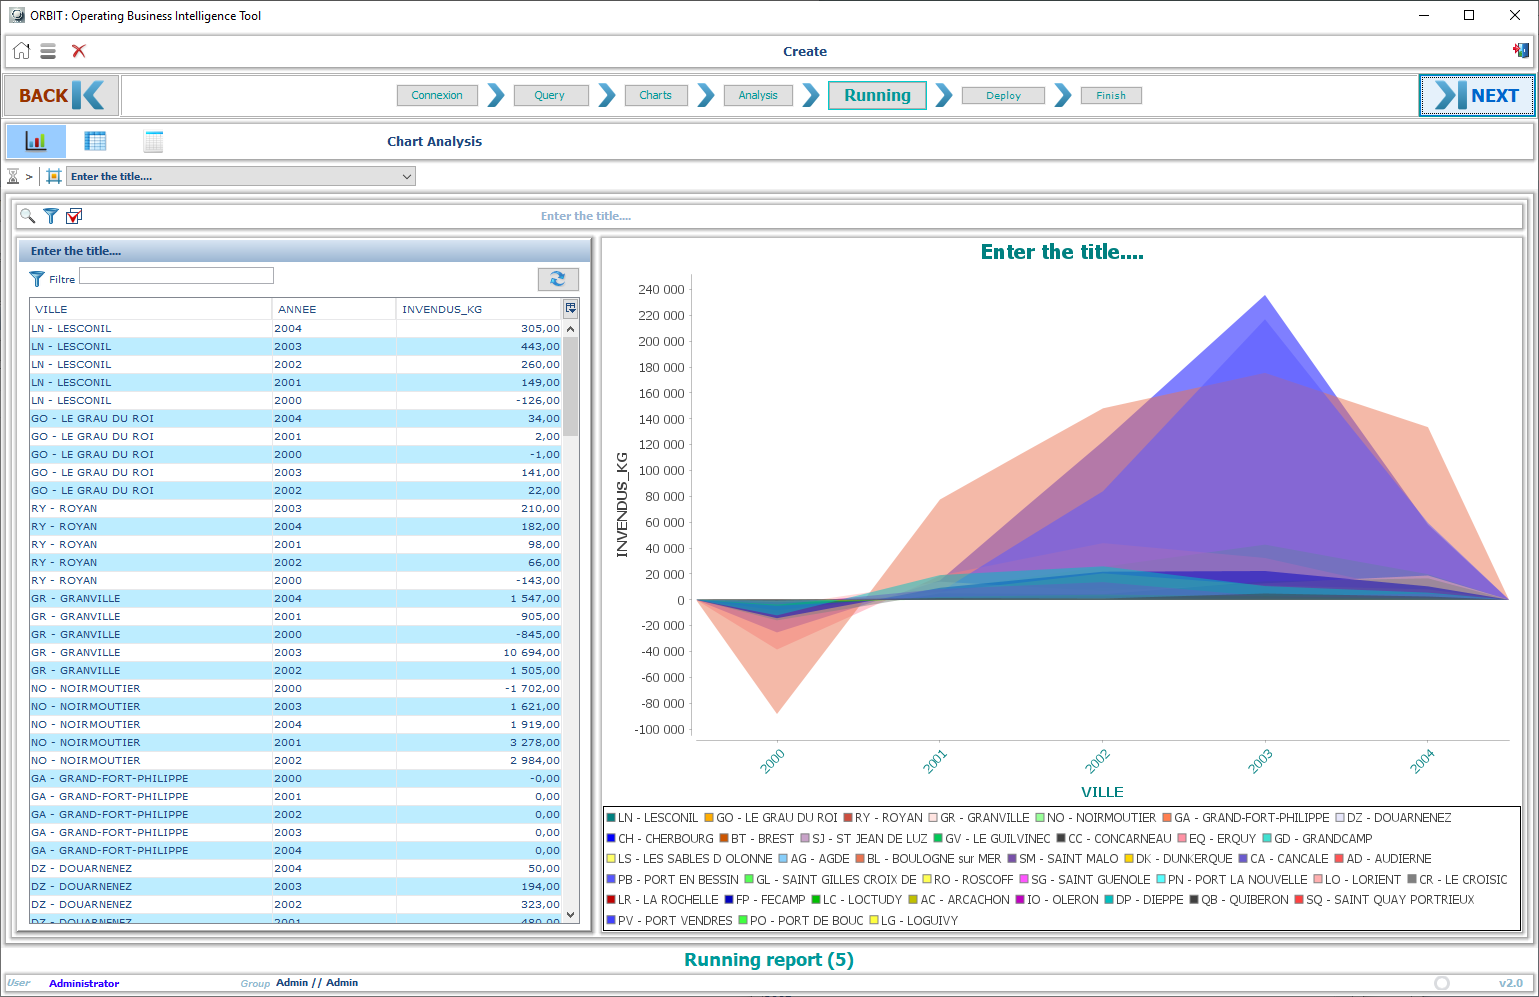
- Run your Report
- View your Report
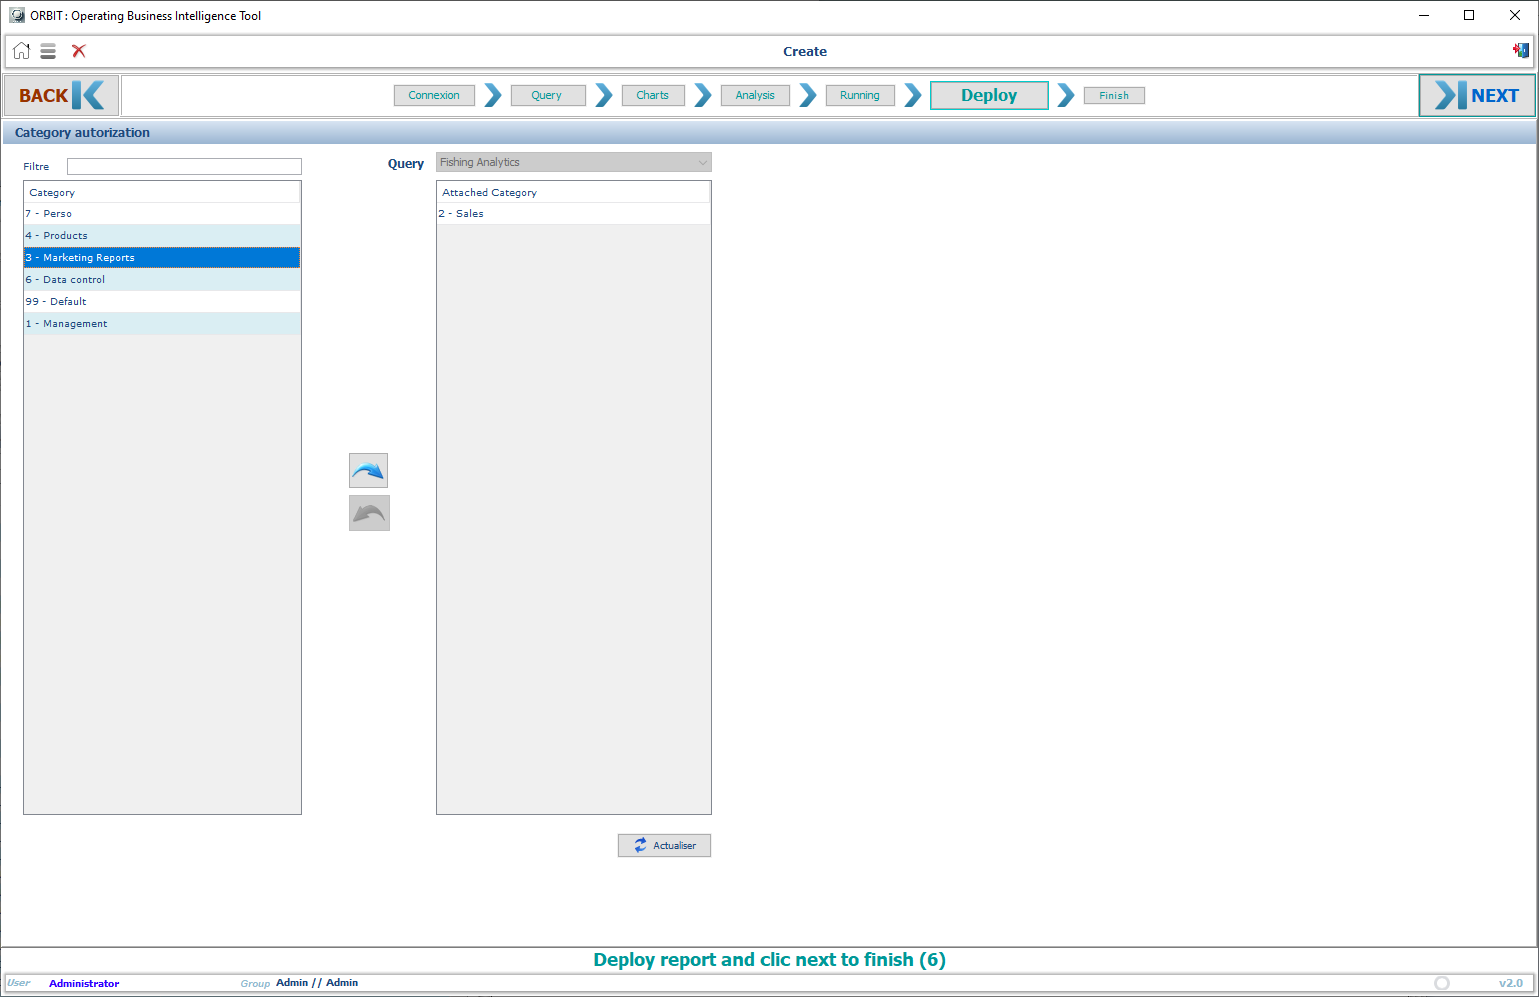
 10.Deploy your Report
 —
—
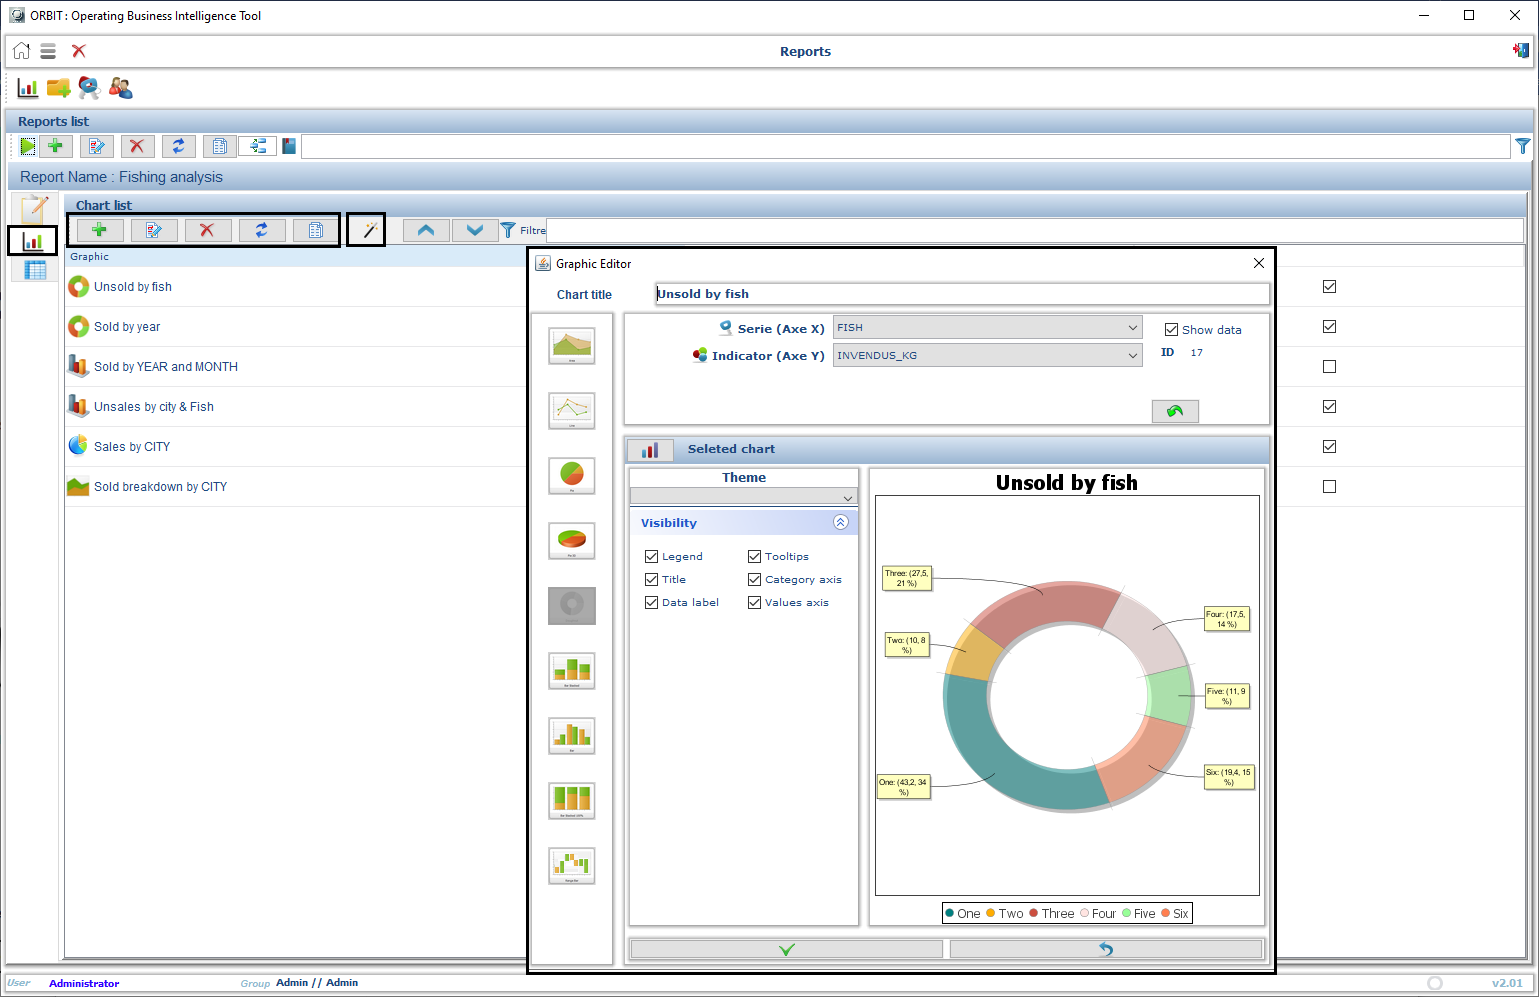
3. Generating Charts and Reports
Once the query is executed, you can generate different types of charts and reports:
- Select “Chart Options” to choose from histograms, line graphs, and pie charts.
- Customize the chart based on the data fields in your query.
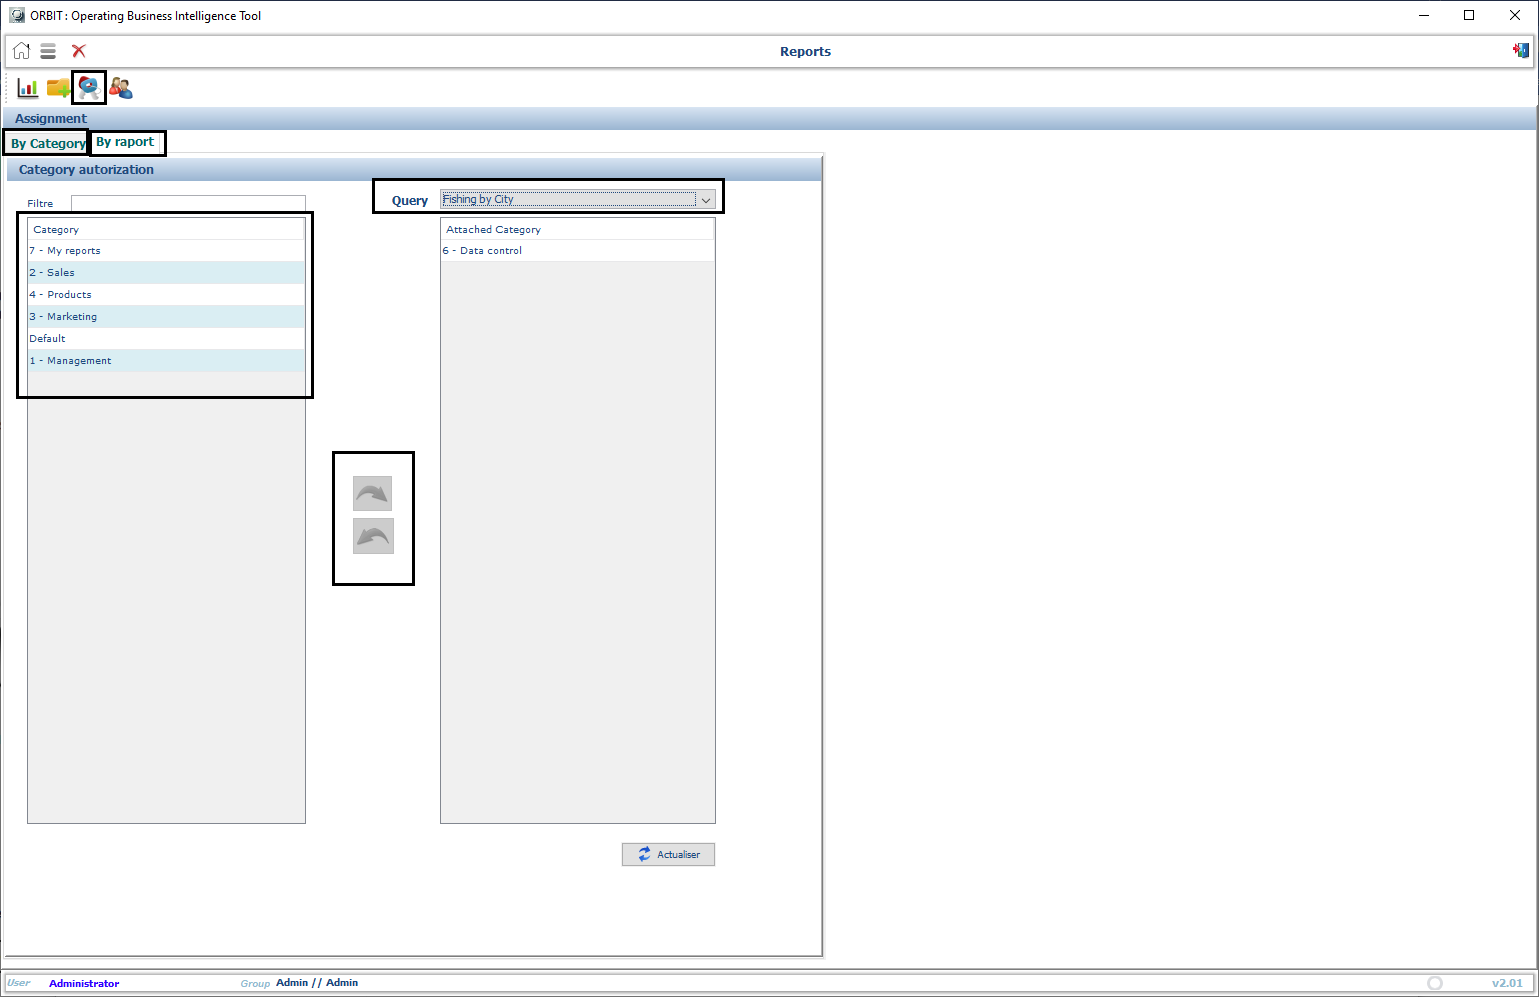
4. Publishing Reports
You can organize your reports and make them easily accessible:
- Select “Publish Report” and assign a custom category.
- The report will appear on the homepage under the relevant category.
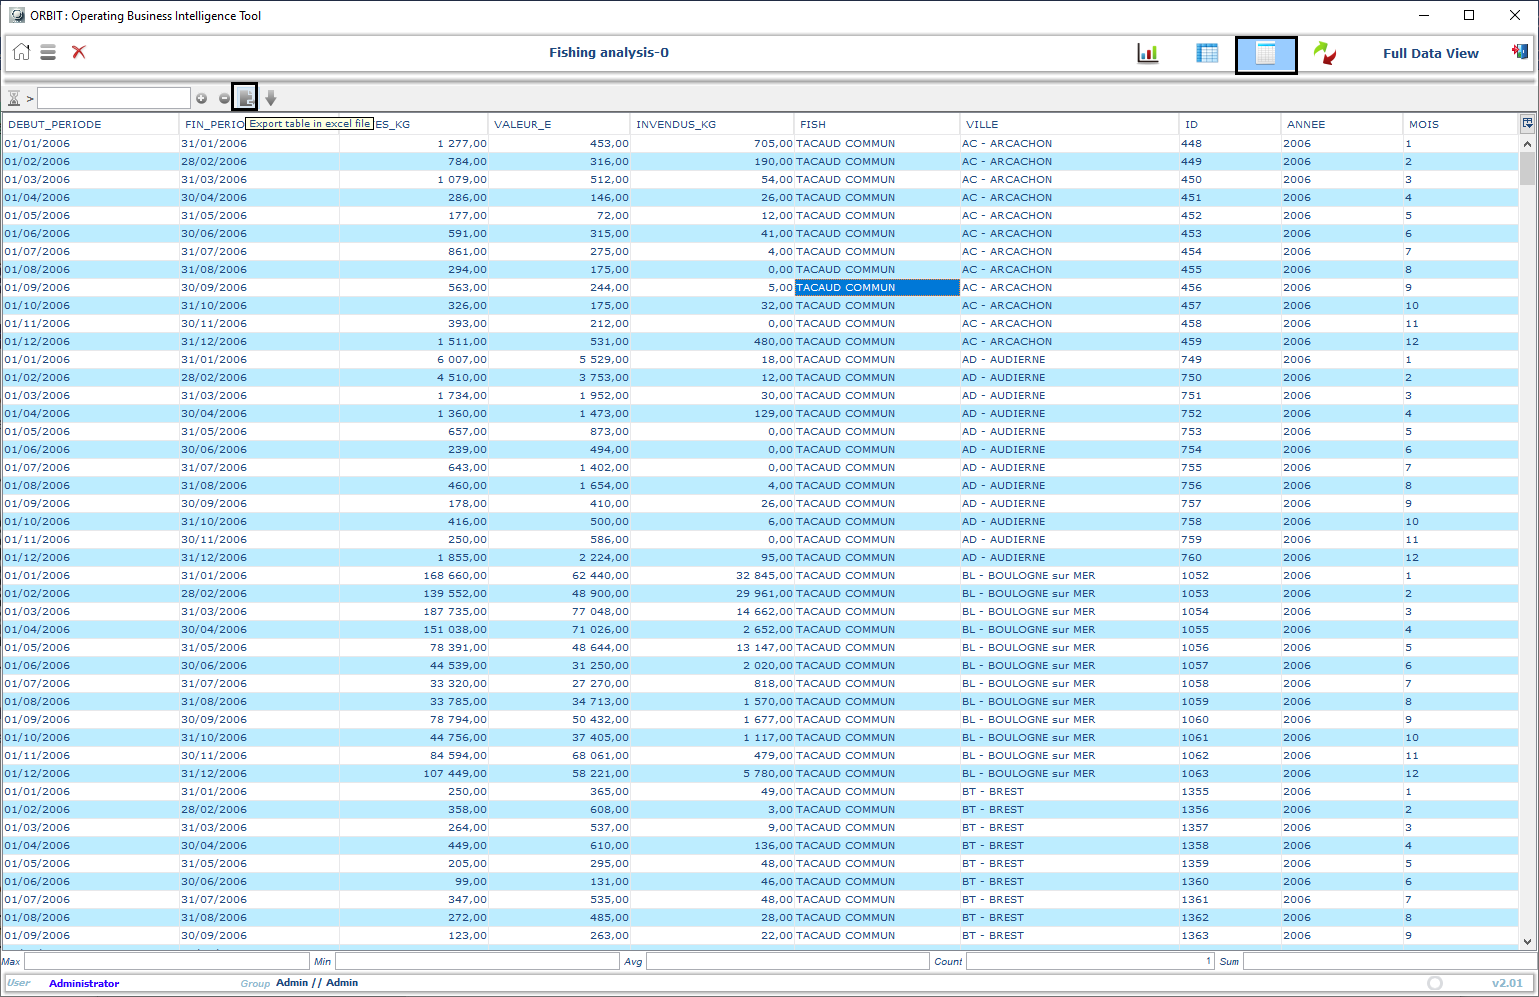
5. Exporting Data
To export the generated data:
- After running a report, click “Export to Excel”.
- Choose the location where you’d like to save the file.
6. Customizing Filters
Refine your data analysis by applying filters to any field in your query:
- Open a report and use the filter options to narrow down the data.
- You can apply filters to any available field like date range, region, or product.

Need Help?
For more information or support, feel free to contact us via ORBIT APP support.